Add a New View
In the Administration module, you can add various views to enhance how content is displayed on your playlists. This flexibility allows for diverse information presentation, improving user engagement.
To Add a View
- Go to Administration > Playlists.
- Click Add Views.
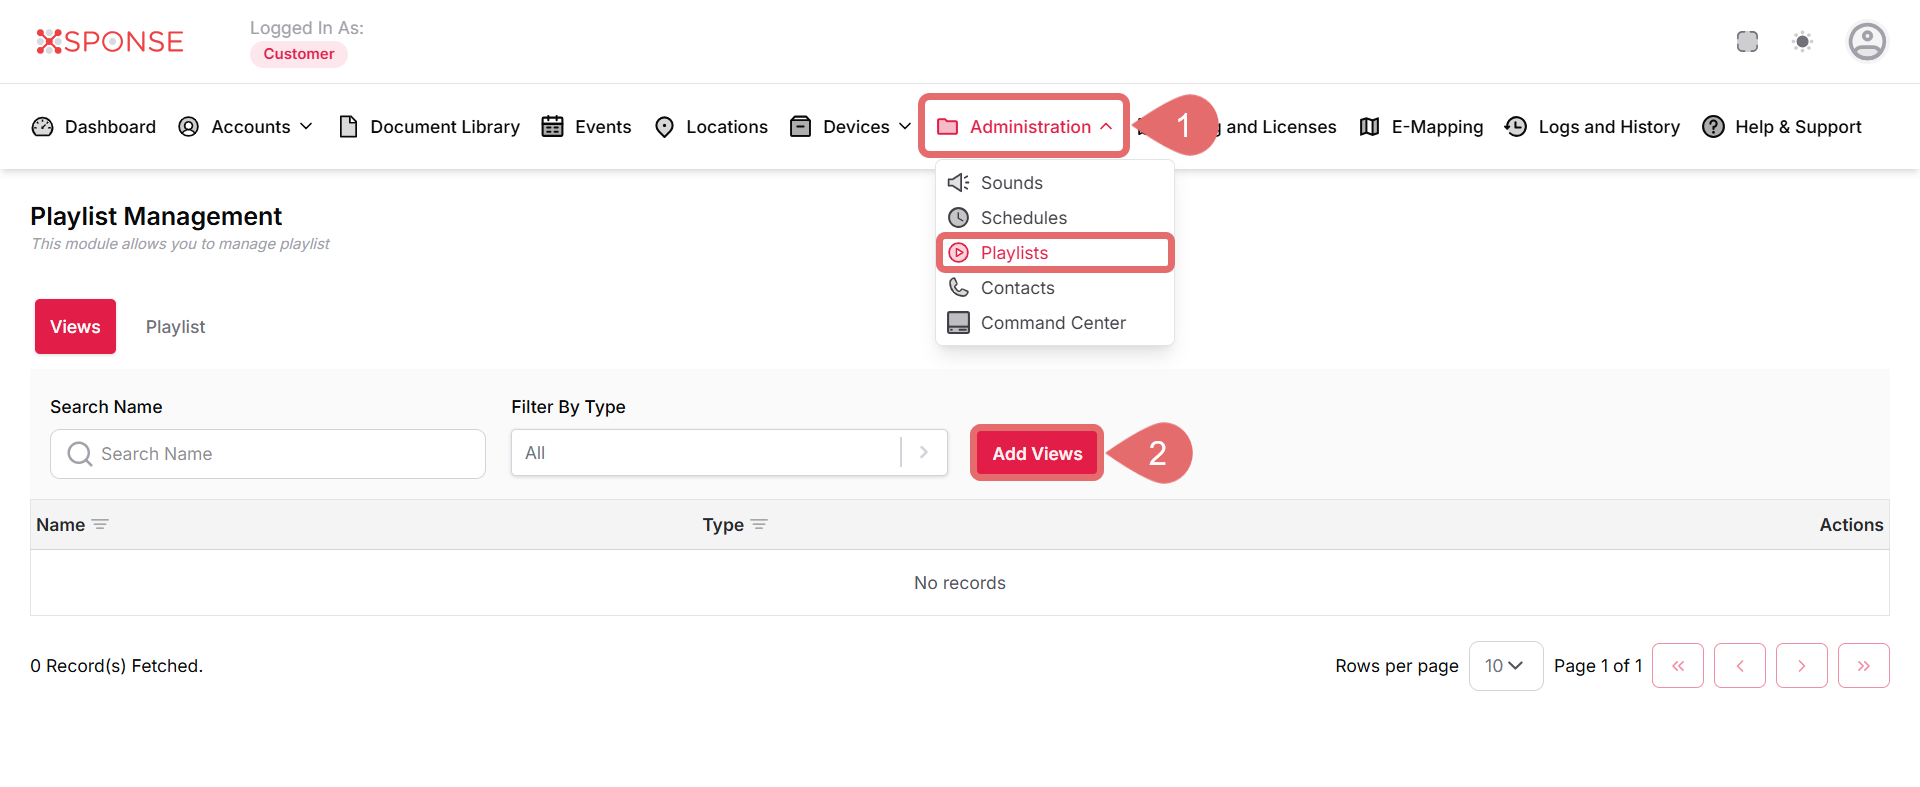
- Select the Type of View:
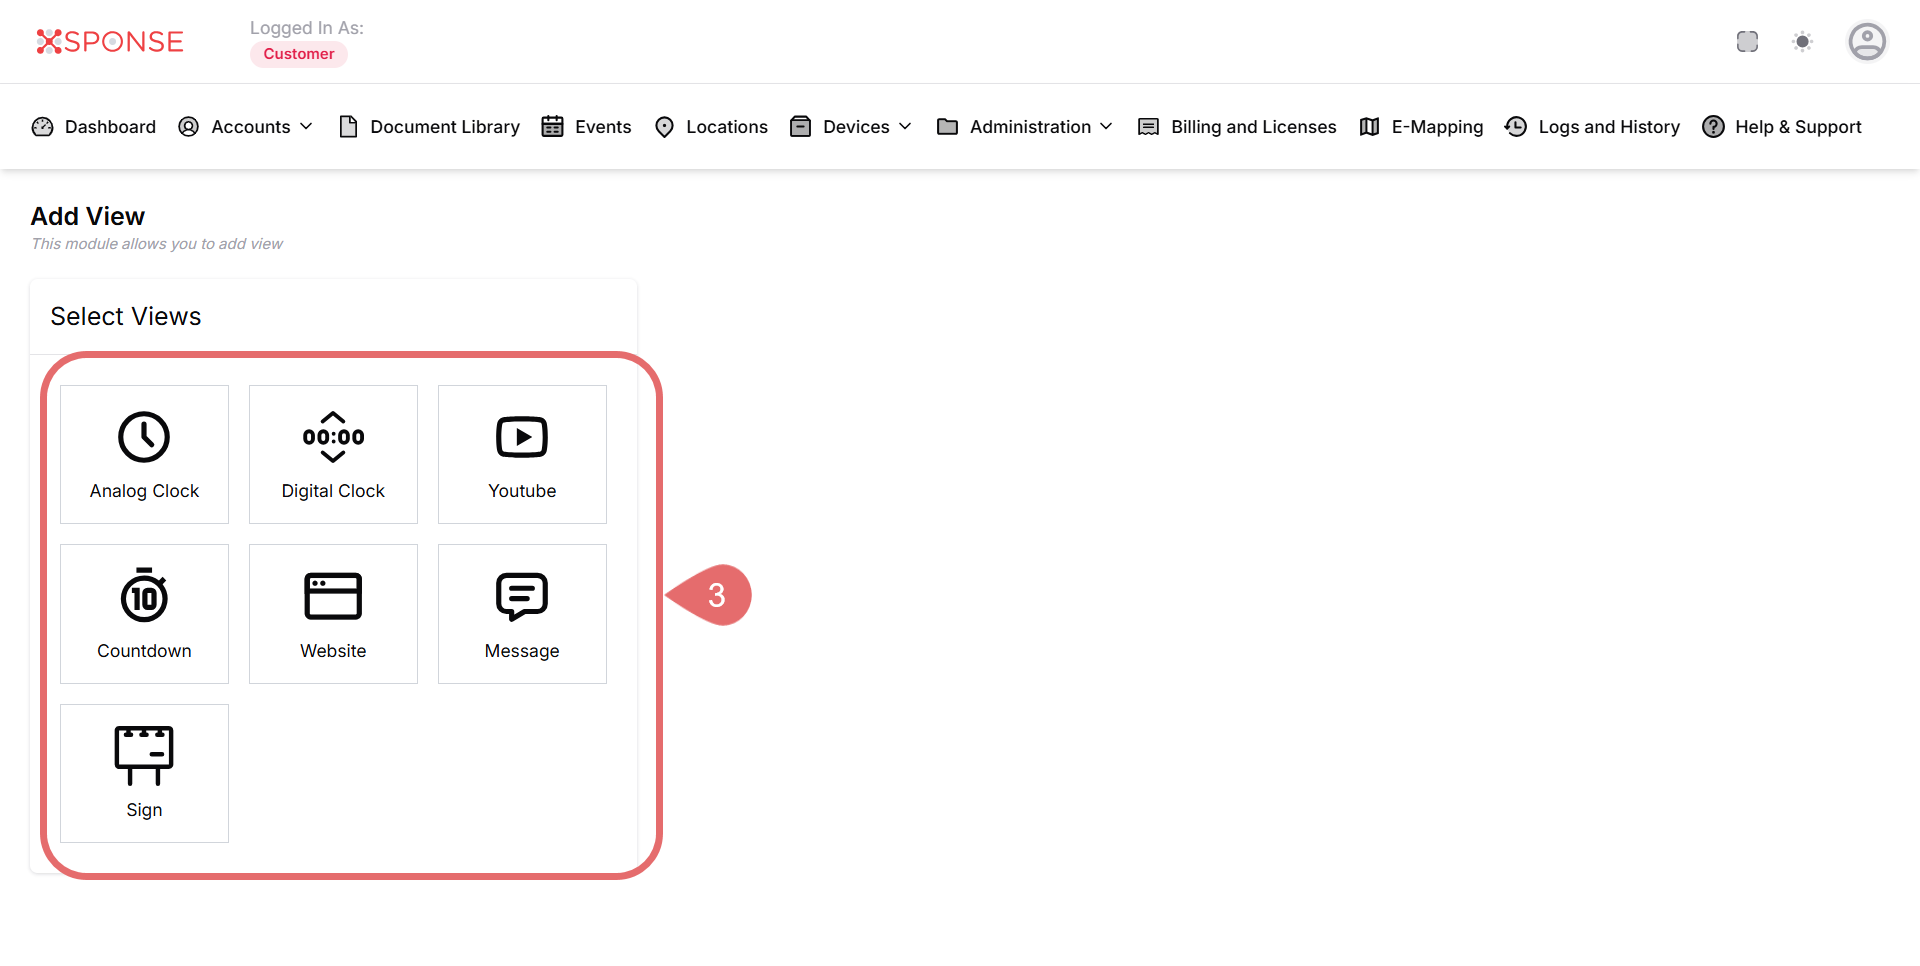
Configuration Details for Each View:
Analog Clock
- Select Time Zone: Choose the appropriate time zone.
- Time Zone Label: Enter a label for the time zone.
- Name: Provide a name for this view.
- Time Zone: Enable or disable the time zone feature.
- Dark Mode: Choose whether to enable dark mode.
- Custom Label: Add a custom label if needed.
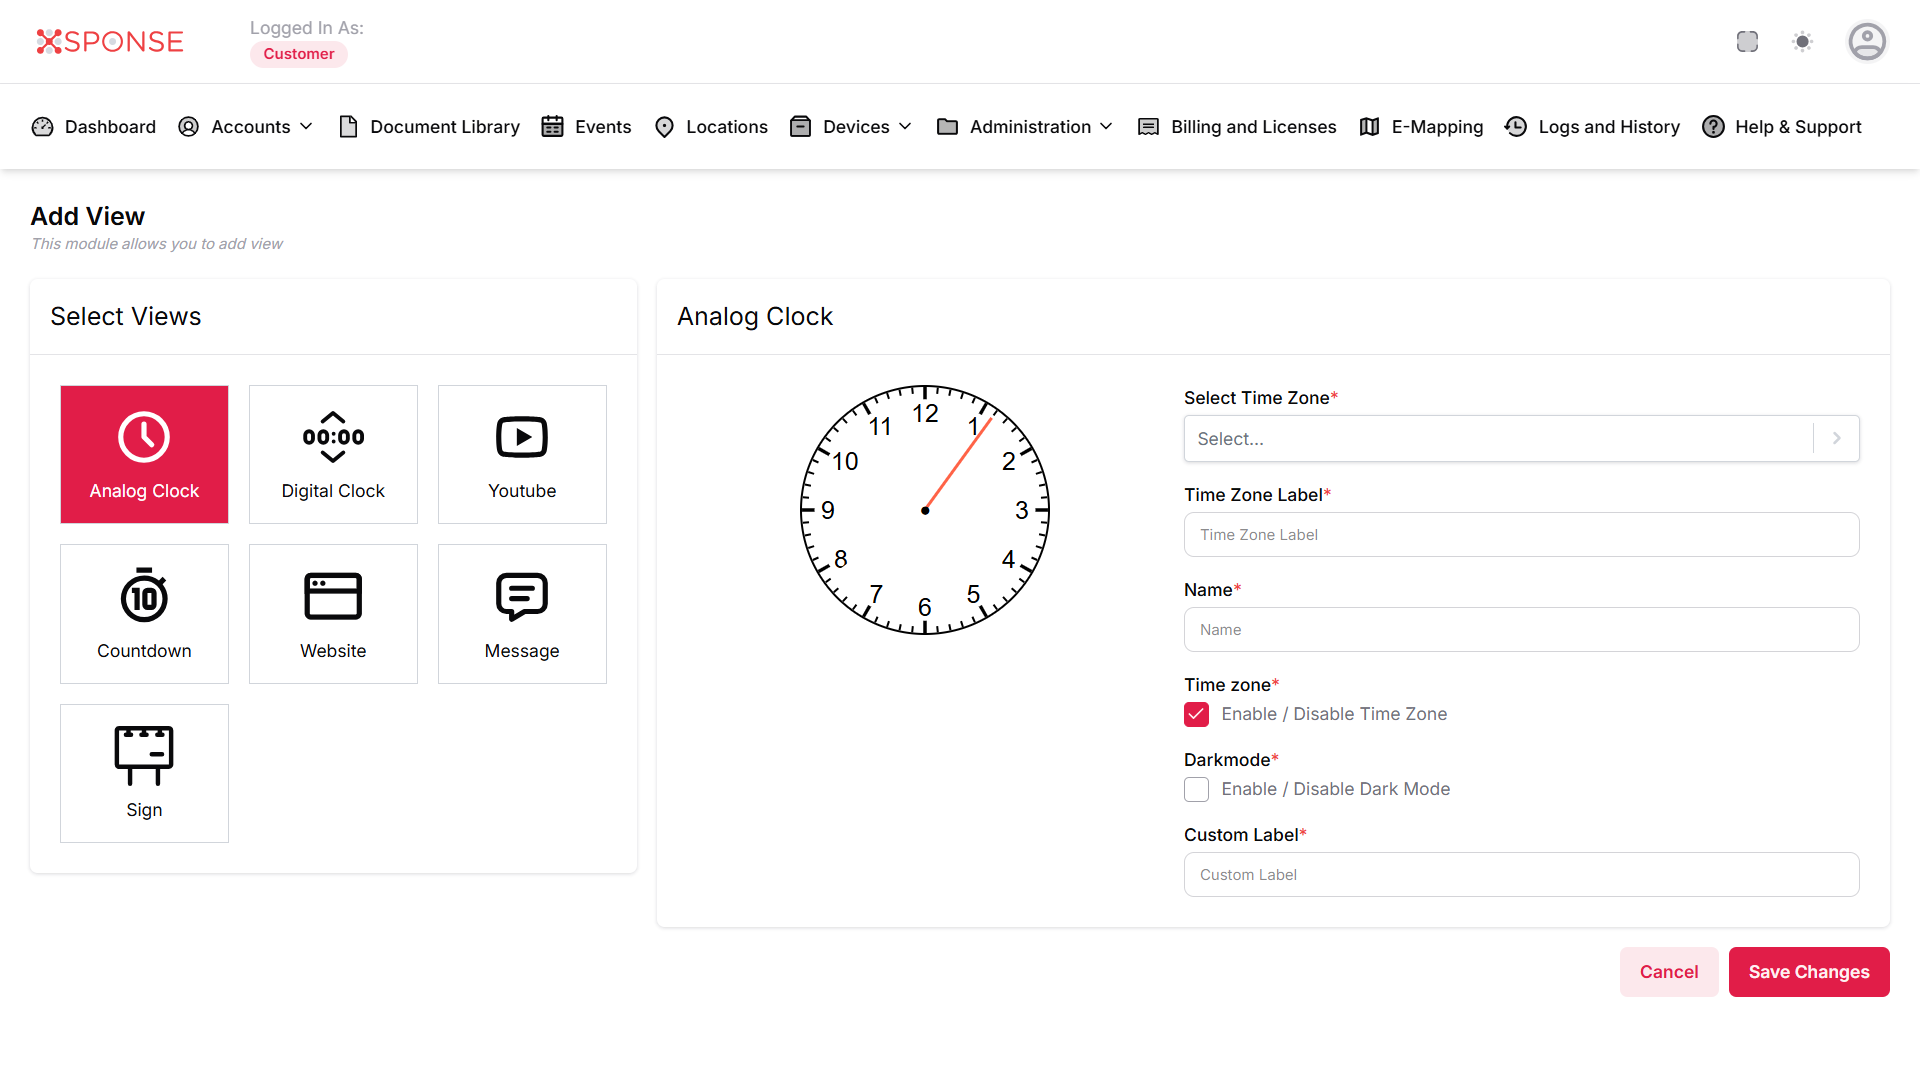
Digital Clock
- Name: Enter a name for the digital clock.
- Select Time Zone: Choose the appropriate time zone.
- Time Zone Label: Enter a label for the time zone.
- Time Zone: Enable or disable the time zone feature.
- Dark Mode: Choose whether to enable dark mode.
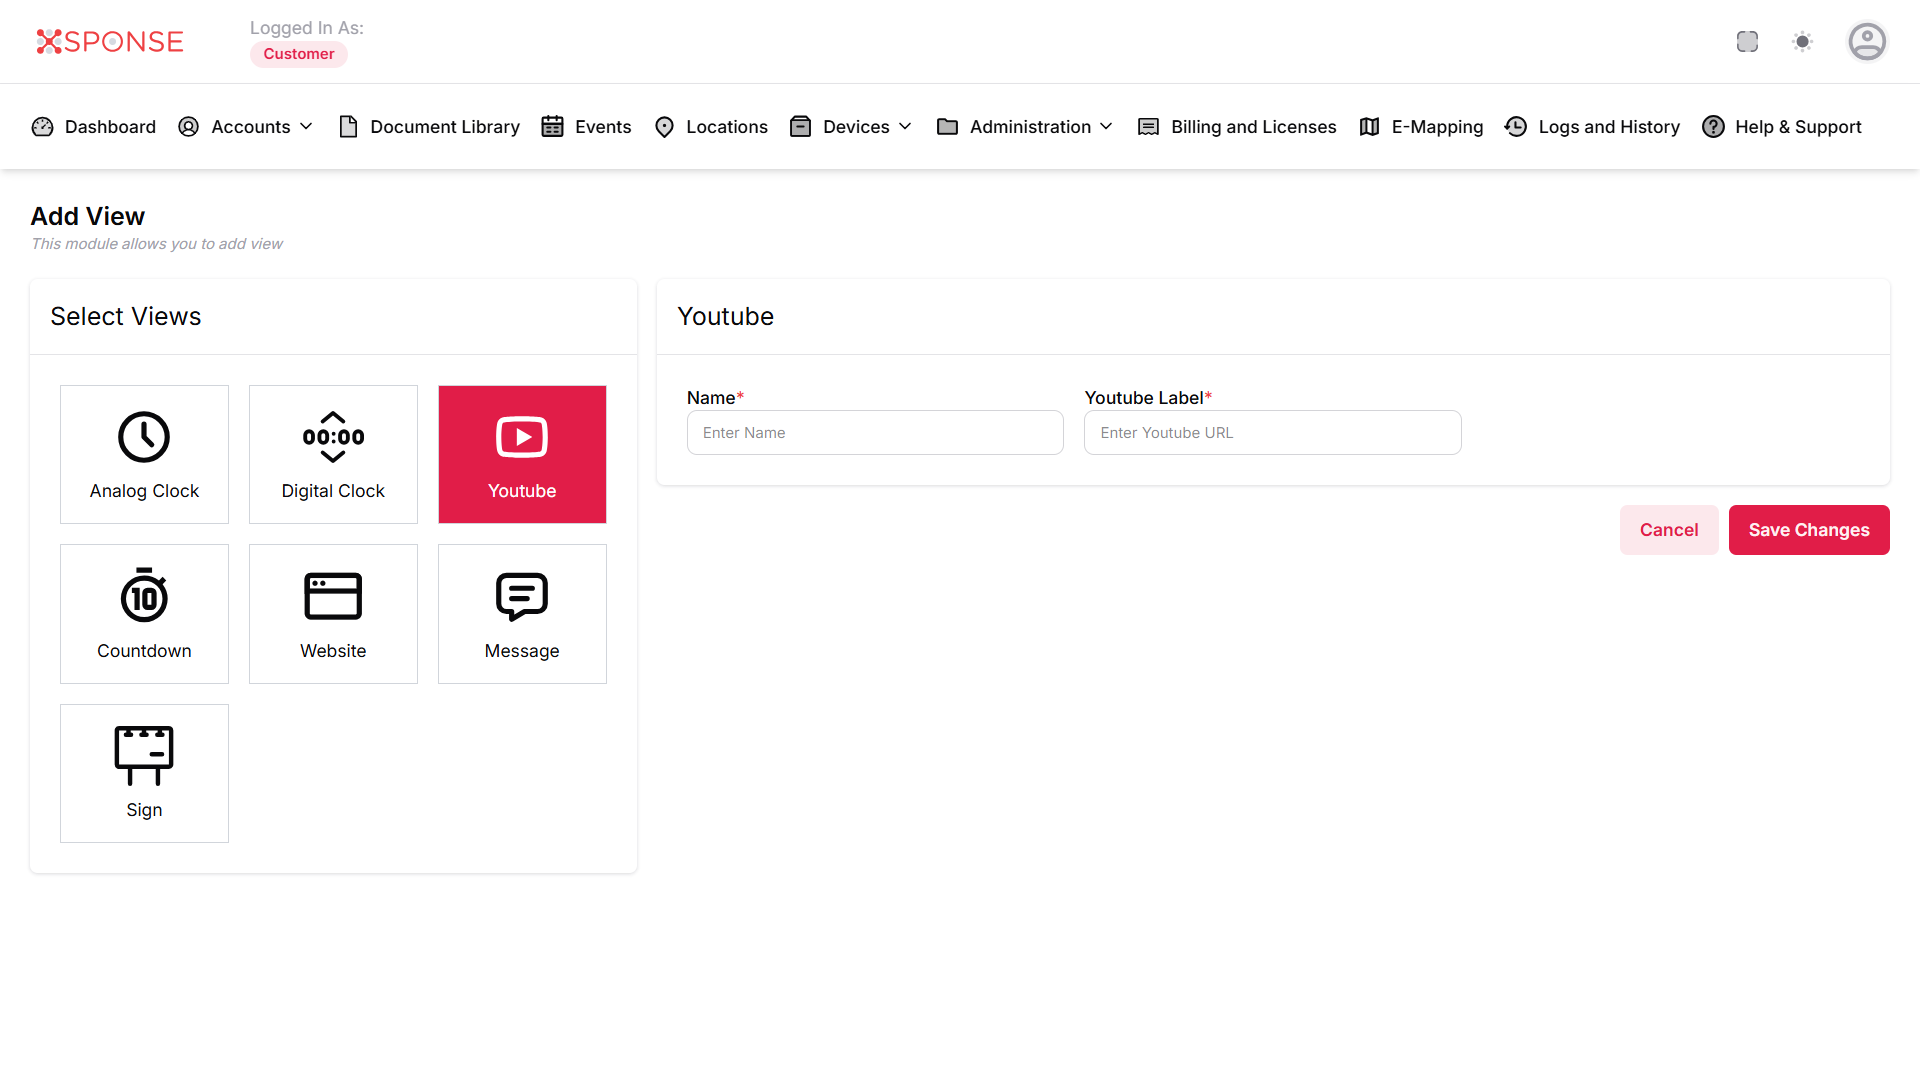
YouTube
- Name: Enter a name for the YouTube view.
- YouTube Label: Provide the URL of the YouTube video.
Countdown
- Set Hours: Specify the number of hours for the countdown.
- Set Minutes: Specify the number of minutes for the countdown. Set Seconds: Specify the number of seconds for the countdown.
- Name: Provide a name for this countdown timer.
- Custom Label: Enter a custom label to display this countdown timer in a specific way.

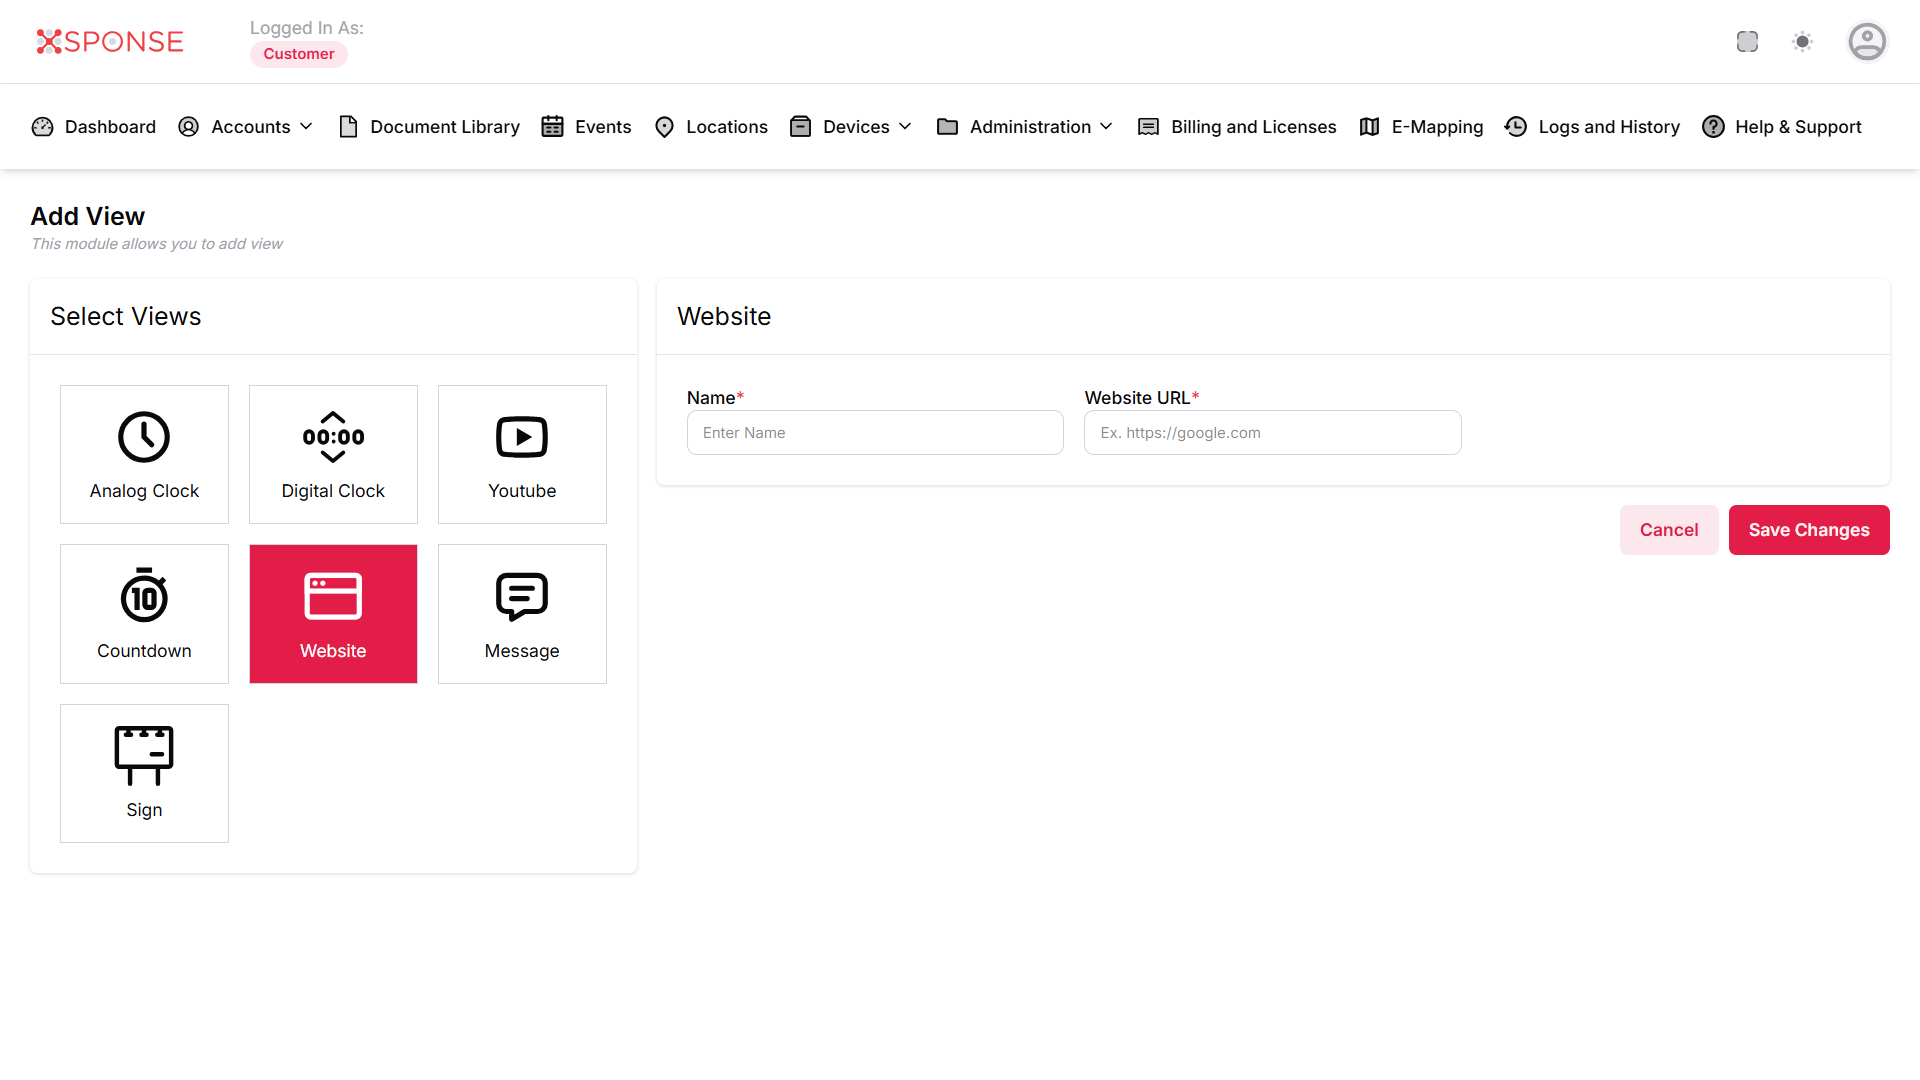
Website
- Name: Enter a name for the website view.
- Website URL: Provide the full URL of the website (e.g., https://google.com).
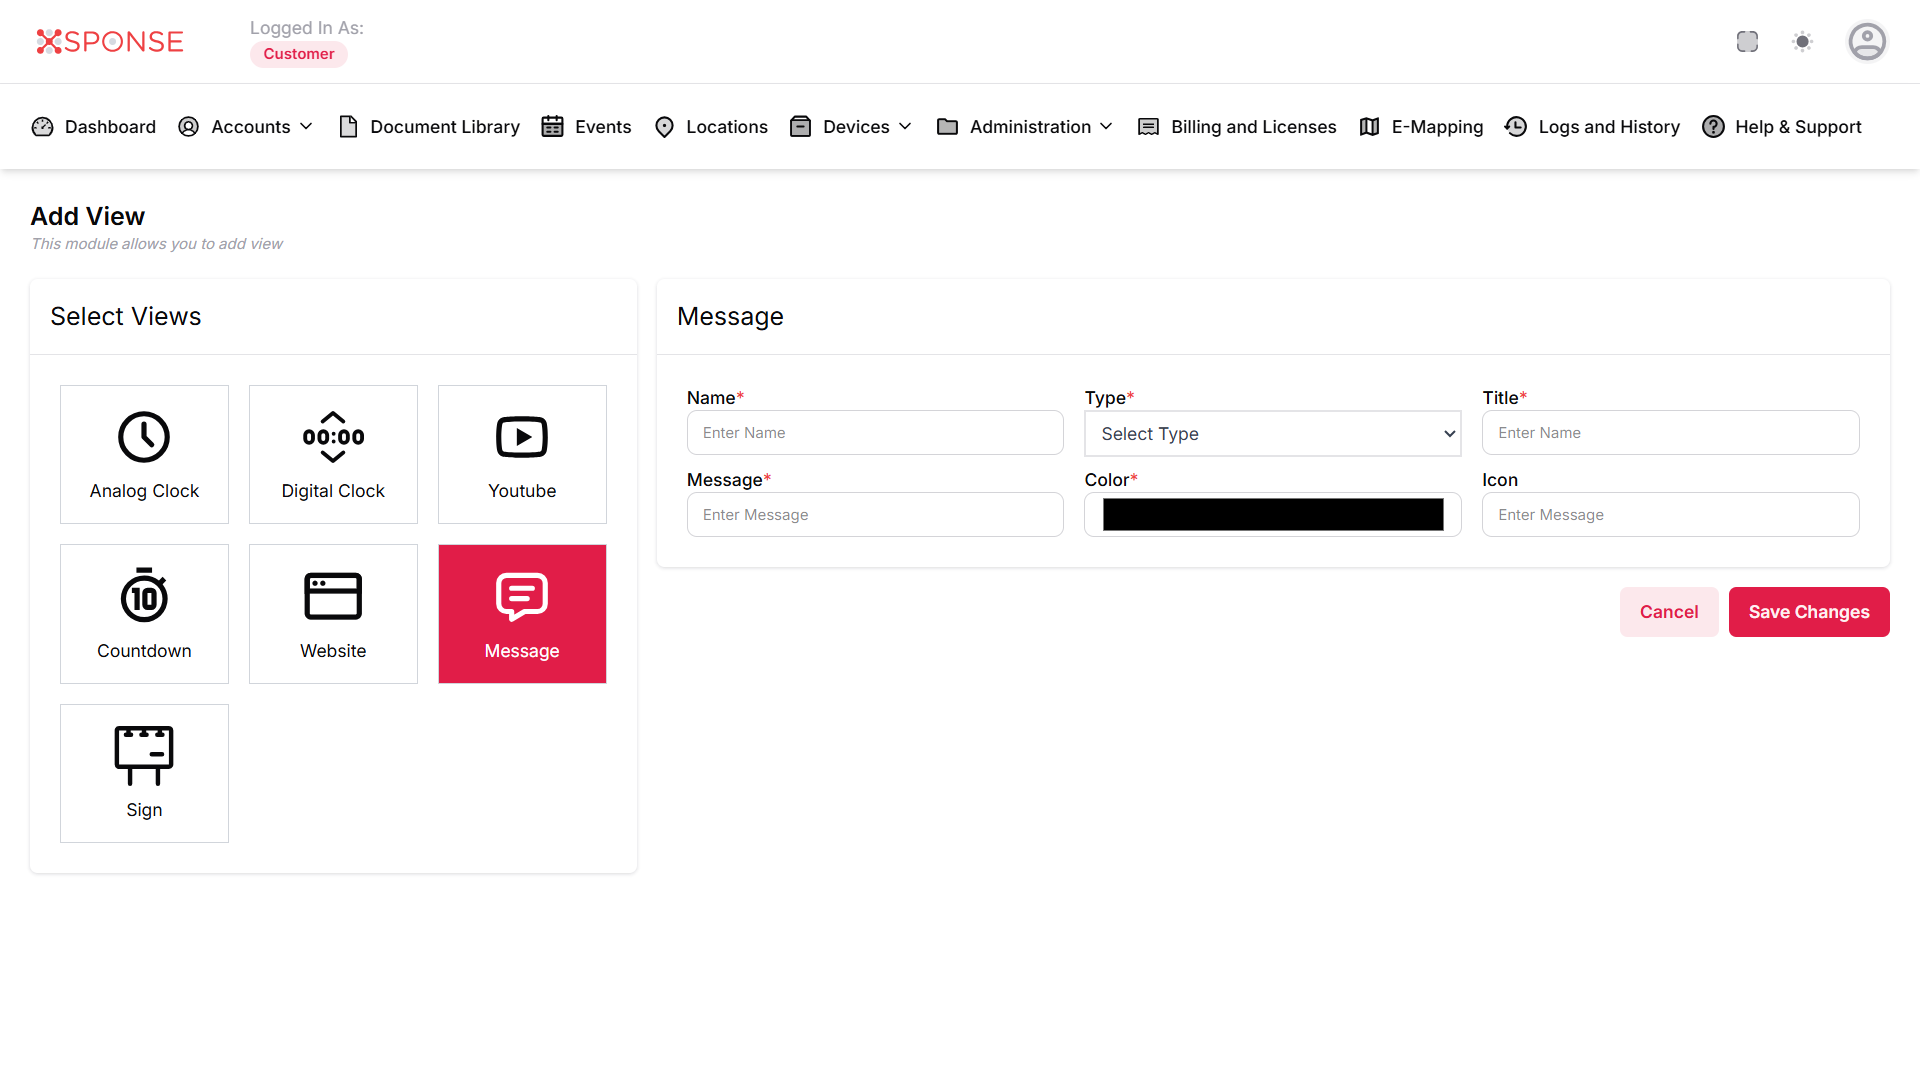
Message
- Name: Enter a name for the message.
- Type: Select the type of message (e.g., information, alert).
- Title: Enter a title for the message.
- Message: Input the message content you want to display.
- Color: Choose a color for the message display.
- Icon: Select an icon to represent the message.
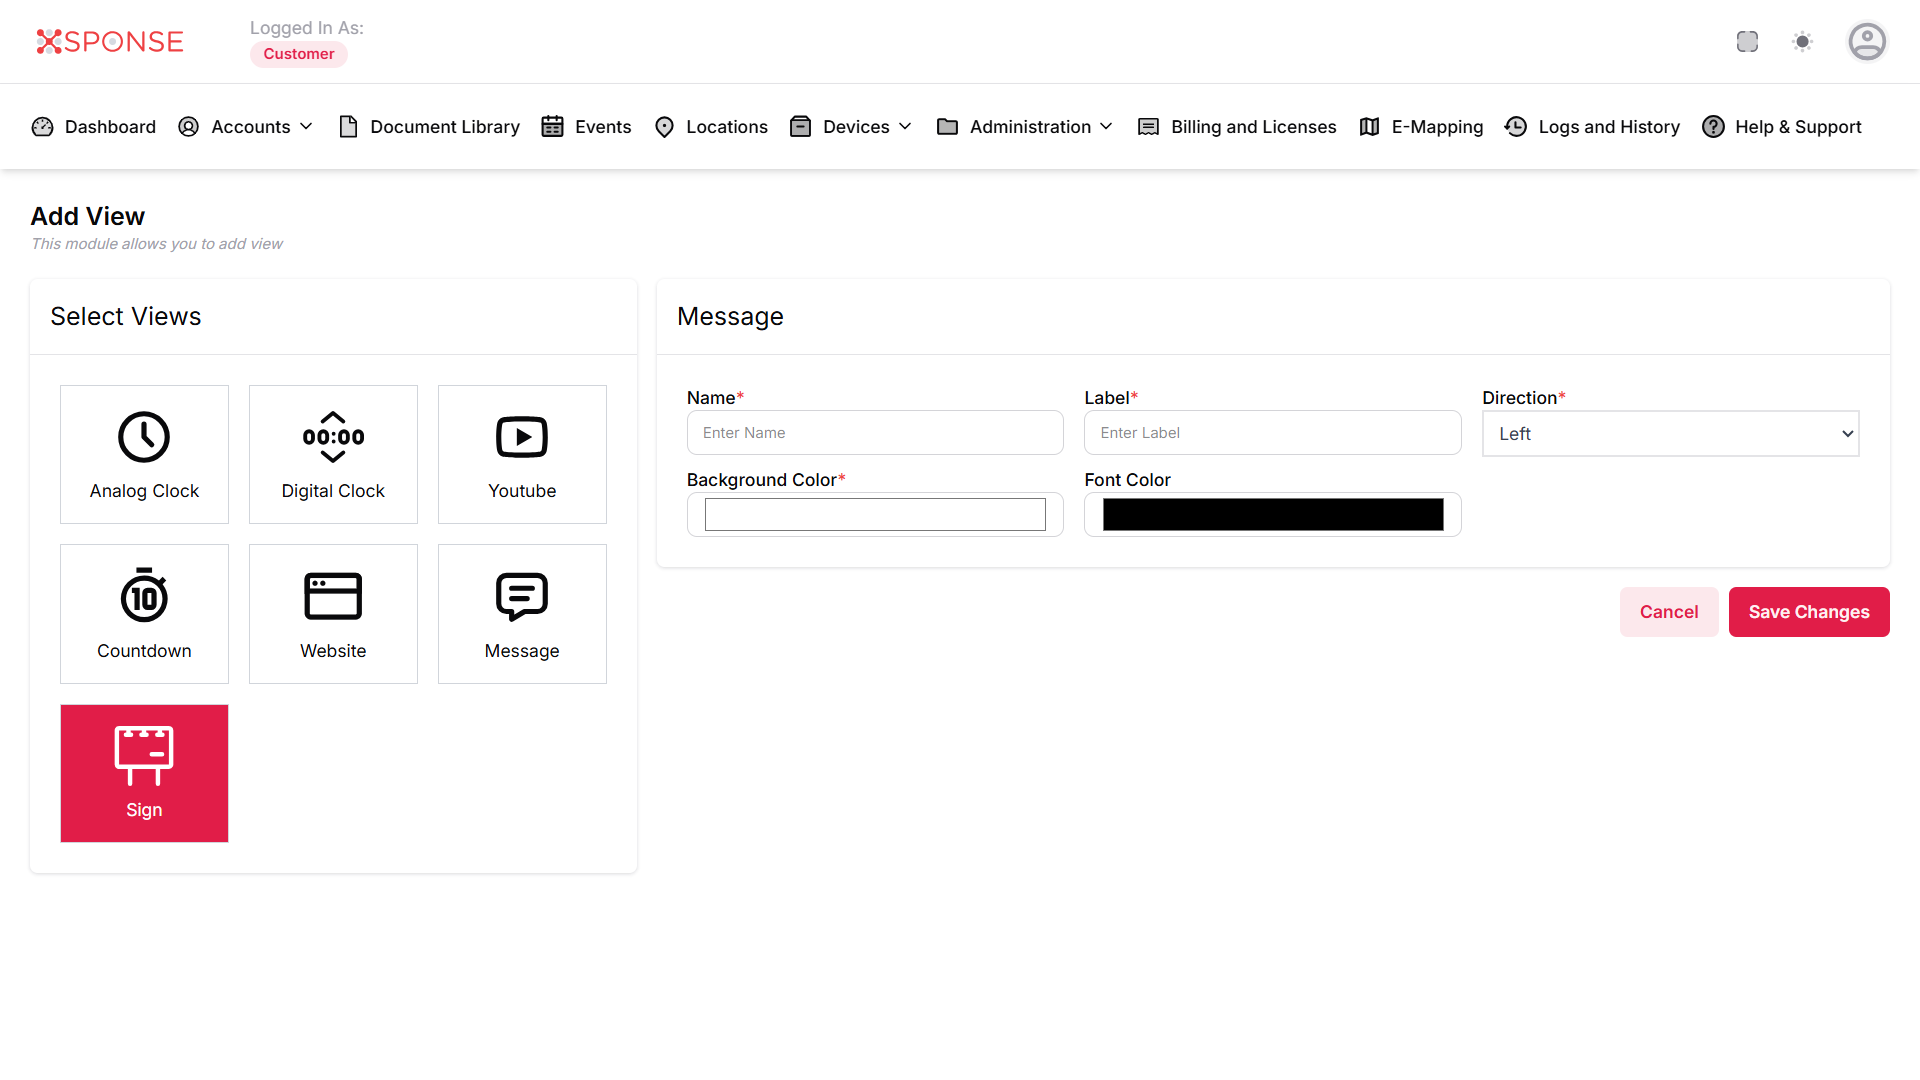
Sign
- Name: Enter a name for the sign view.
- Label: Provide a label for the sign content.
- Direction: Select the direction of the sign (e.g., left, right).
- Background Color: Choose a background color for the sign.
- Font Color: Select a font color for the text.
Once you have filled in all required fields for the selected view, click Save Changes. If you want to discard your changes, click Cancel.
See Also
To complement your knowledge of this process, check the following pages: